Using the View Transitions API, you can implement simple, smooth animations with continuity.
There are many ways to create animations on the web. Many of you probably already use CSS transition and animation, or the Web Animations API in JavaScript. The View Transitions API makes it possible to create new kinds of transition animations that were difficult to achieve with those techniques alone.
This article explains what it can do, how to use it, and important points to keep in mind.
What this article covers
- The View Transitions API enables a new kind of transition animation
- It can be used easily with JavaScript and CSS (for SPAs)
- Support in JavaScript frameworks is also progressing
- It can even be used without JavaScript (for MPAs)
What can you do with the View Transitions API?
Here are some examples using the View Transitions API, starting with an original demo.
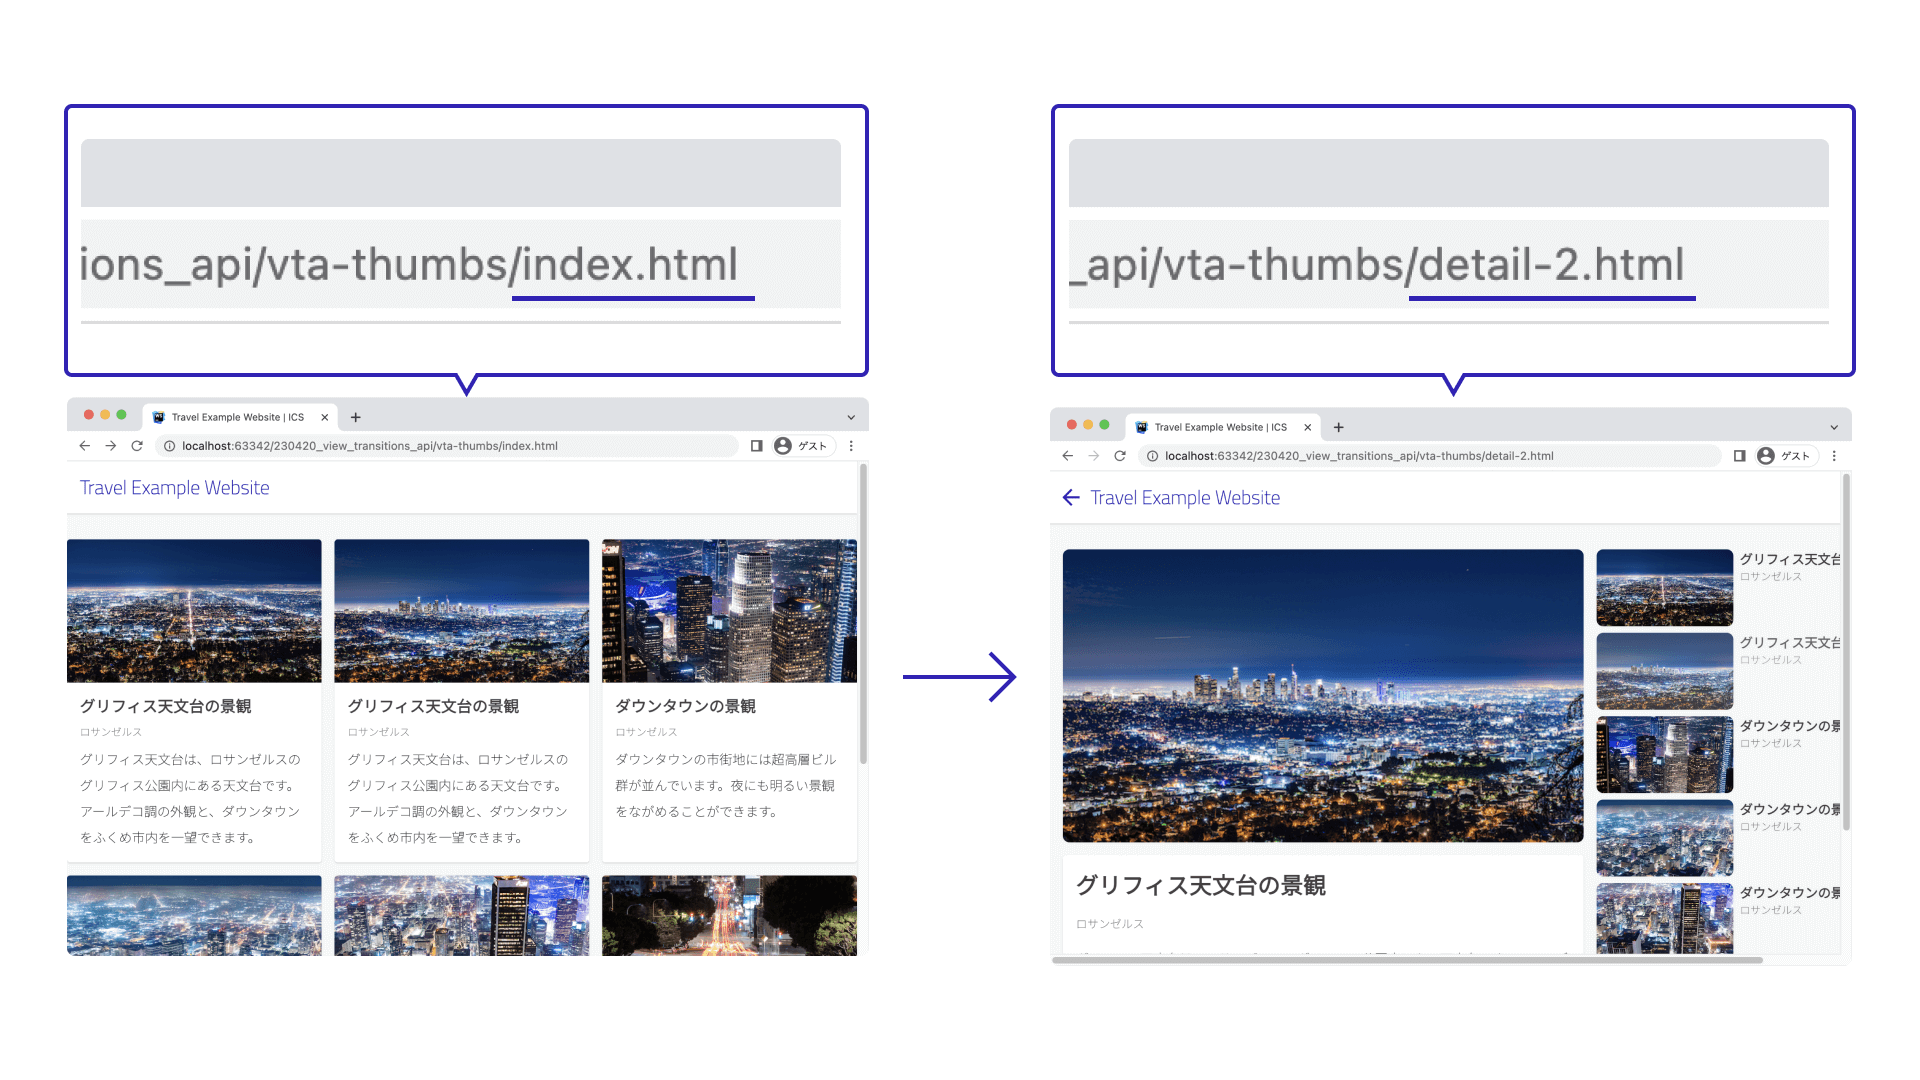
Transitions between multiple pages
This demo transitions between a list view and a detail view. The thumbnail image in the list view moves into the main image in the detail view. Because the selected content moves toward the center of the screen, users can interact without losing visual focus.
The animation also runs when the user performs browser history actions such as Back and Forward. When going back, the animation moves to the left. When going forward, it moves to the right. This expresses the relationship between screens through motion.
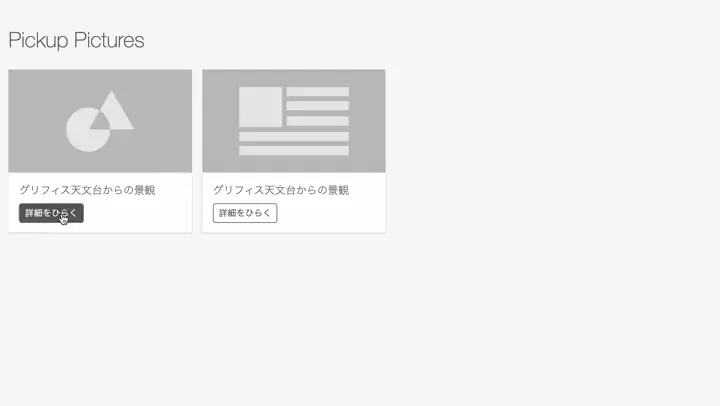
Modal display
This is a demo that transitions continuously between a list view and a detail view (a modal dialog). It is implemented with Vue.js. It shows that the View Transitions API can be used even when working with libraries such as Vue.js or React.
Slideshow
This is a simple demo presented as a 3D slideshow. You can incorporate custom CSS animations into effects built with the View Transitions API.
UI effects
The View Transitions API was used for UI effects in this image viewer. A lightbox-style UI can be created in other ways as well, but the View Transitions API allows it to be implemented with compact code. It is useful not only for large-scale transition effects, but can also help with UI effects as microinteractions.
UI effects on our media site
This site also uses the View Transitions API for UI effects. It has been in production for about one month. We have had no operational issues, and it has been stable.
What makes it special?
Here is what is new about the View Transitions API.
Before and after a page transition on a website, even elements that look the same are often located in different parts of the DOM tree. Because of that, it was difficult to implement an animation in which a specific element appears to connect to a different DOM on another screen.
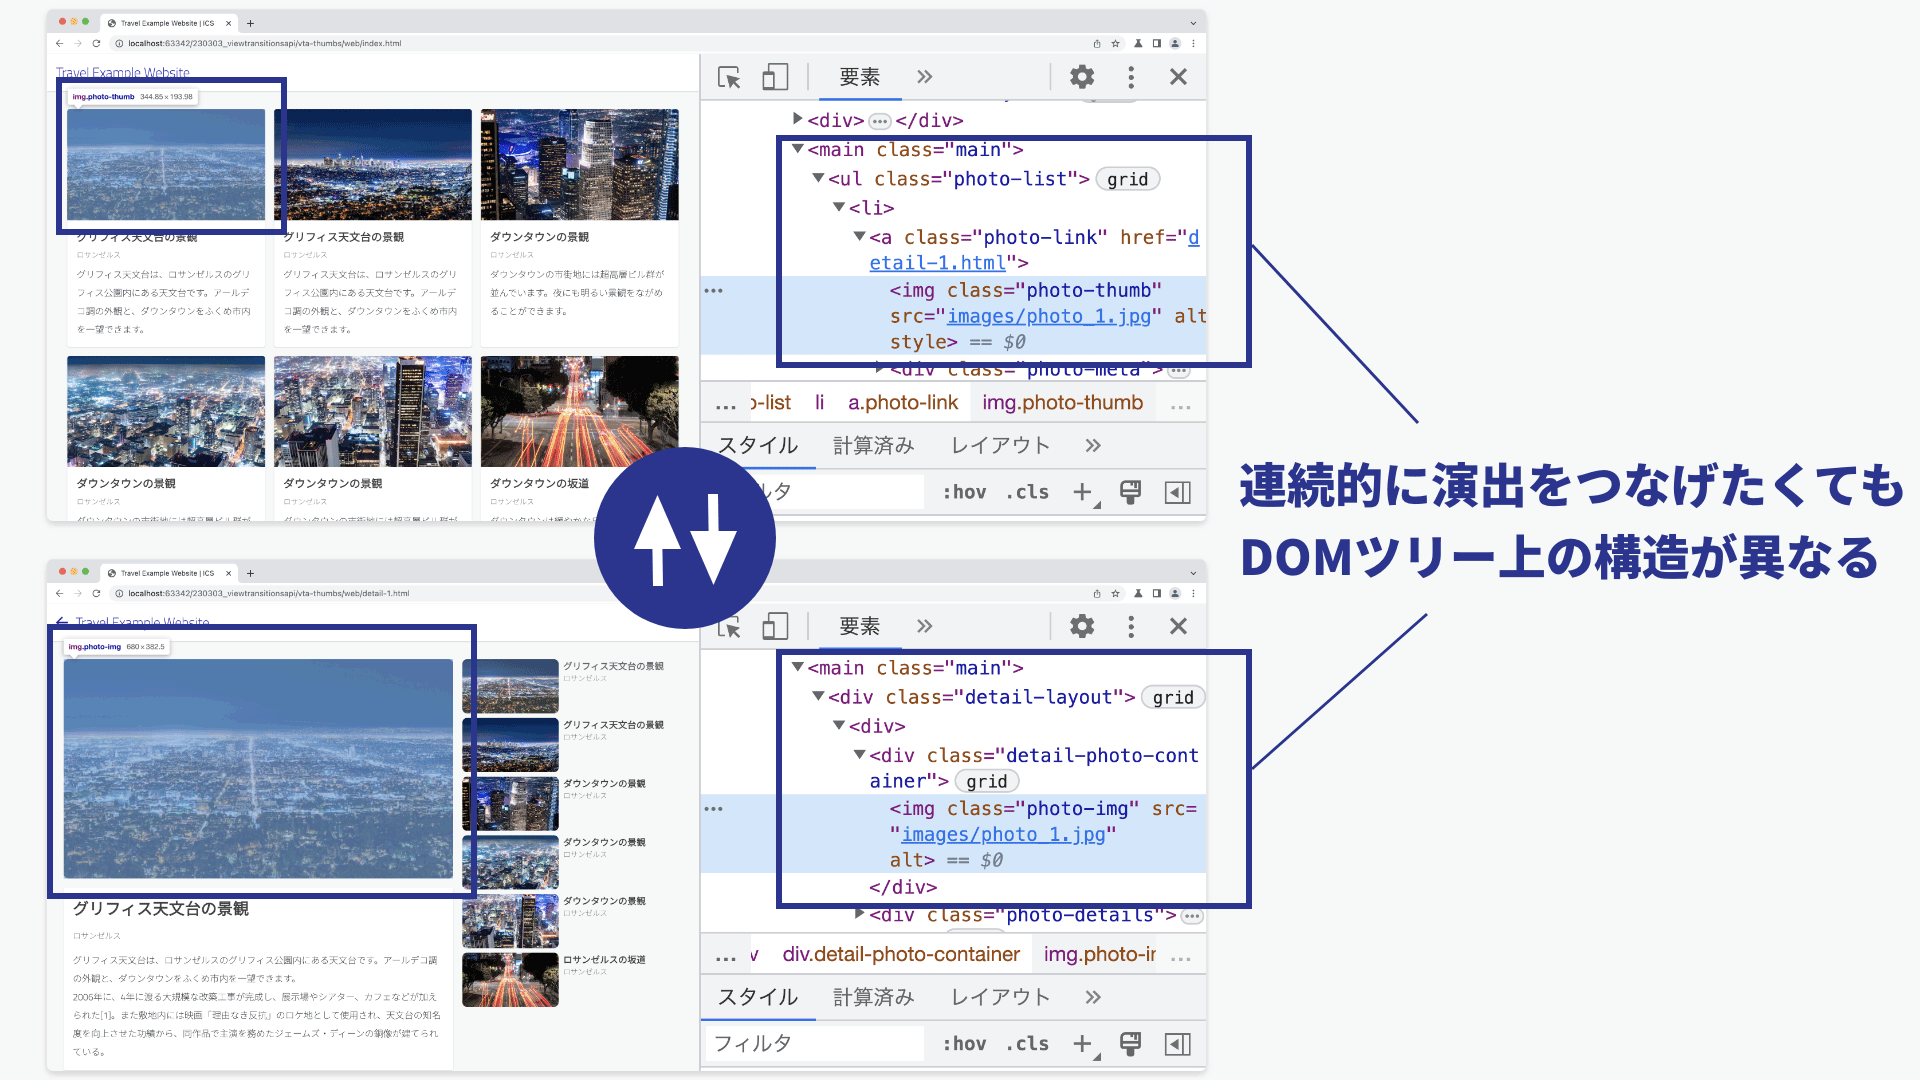
With the View Transitions API, you can use CSS and JavaScript to create effects that change continuously despite differences in DOM tree structure. This is groundbreaking, because you can build animations without being constrained by differences in DOM structure between pages.
Screen transition animations
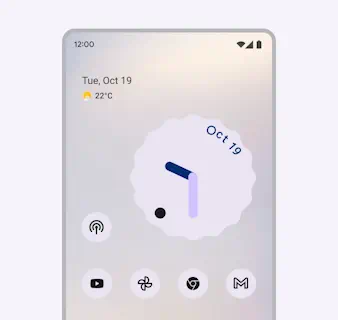
This kind of connected animation is new on the web, but many people have probably seen it in mobile apps. It is mentioned in various design systems as a way to improve the user experience. Material Design’s ‘Transitions – Material Design 3’ includes an explanation.
Transitions are a core part of good UX because they help users understand how an app behaves. When designed well, they make the experience feel polished and expressive.
Also, Microsoft documentation refers to animation during screen transitions as ‘Connected animation - Windows apps | Microsoft Learn’. The following benefits are described.
Connected animations create a strong visual metaphor that highlights the relationship between two views by drawing attention to shared content. They can also add visual interest and polish when moving between pages.
How to use the View Transitions API (MPA)
Enough preamble. Let’s look at how to use the View Transitions API. It can be used in both MPAs and SPAs. Because MPAs are simpler, let’s start there.
MPA stands for Multi-Page Application. It refers to an architecture with multiple HTML files.
Open the following demo in Chrome 126, Edge 126, or Safari 18.2 or later.
There are three HTML files, and each is linked with an <a> tag.
- index.html
- page-1.html
- page-2.html
Each HTML file applies the following stylesheet. By specifying @view-transition, you can enable page transition animations in a multi-page application.
@view-transition {
  navigation: auto;
}
For the element you want to connect in the list view, specify view-transition-name in CSS. Use the same name on both the page before and after the transition. Matching names make them a connection target.
Page before the transition (index.html) excerpt
<style>
  @view-transition {
    navigation: auto;
  }

  /* Photo 1 */
  .photo-1 {
    view-transition-name: photo-example-1;
    contain: paint;
  }
</style>
<!-- List view -->
<div id="view-index">
  <!-- Image -->
  <img class="photo-1"
        src="images/photo_1.webp" />
</div>
Page after the transition (page-1.html) excerpt
<style>
  @view-transition {
    navigation: auto;
  }

  /* Photo 1 */
  .photo-1 {
    view-transition-name: photo-example-1;
    contain: paint;
  }
</style>

<!-- Detail view -->
<div class="view-detail">
  <img class="photo-1"
      src="images/photo_1.webp" />
</div>
That is all you need. The animation will be applied during page transitions. Simple.
How to use the View Transitions API (SPA)
From here on, let’s look at how to use it in a Single-Page Application (SPA). Note that this differs from the Multi-Page Application approach described above.
Using the View Transitions API in an SPA assumes JavaScript, and it works through a combination of different techniques. Explaining the mechanism all at once would be difficult, so let’s start with small demos and build up an understanding of how it works.
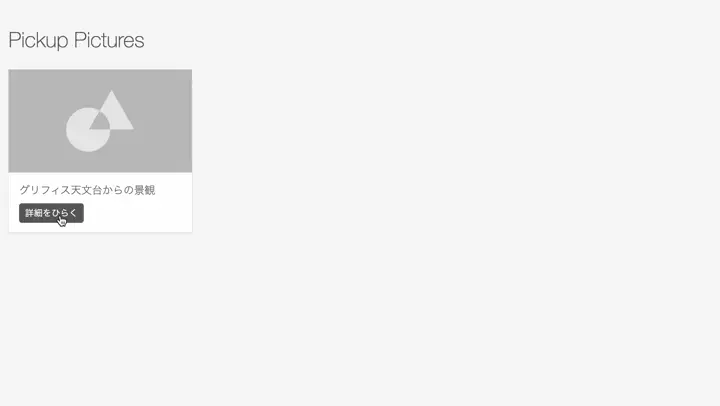
Step 1. Crossfade the entire screen
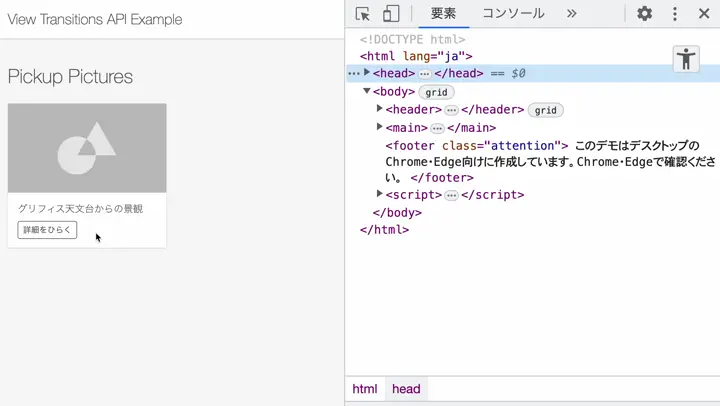
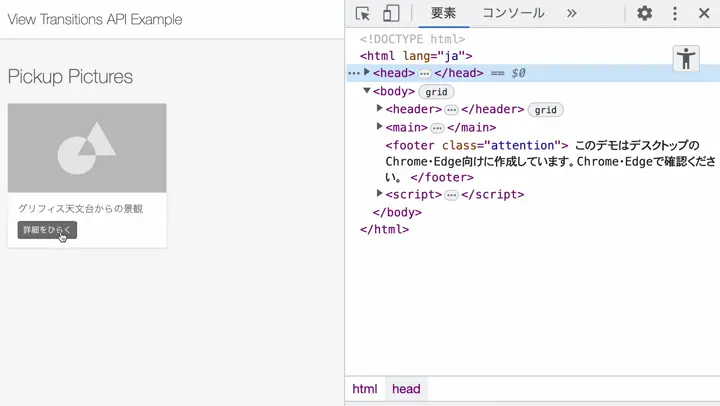
The first example is shown below. Clicking the [Open details] button or the [Back to list] button switches the screen.
With the View Transitions API, you call the document.startViewTransition() method in JavaScript.
// Call the View Transitions API
document.startViewTransition(() => {
  // Define the DOM structure after the transition
  // ...
});
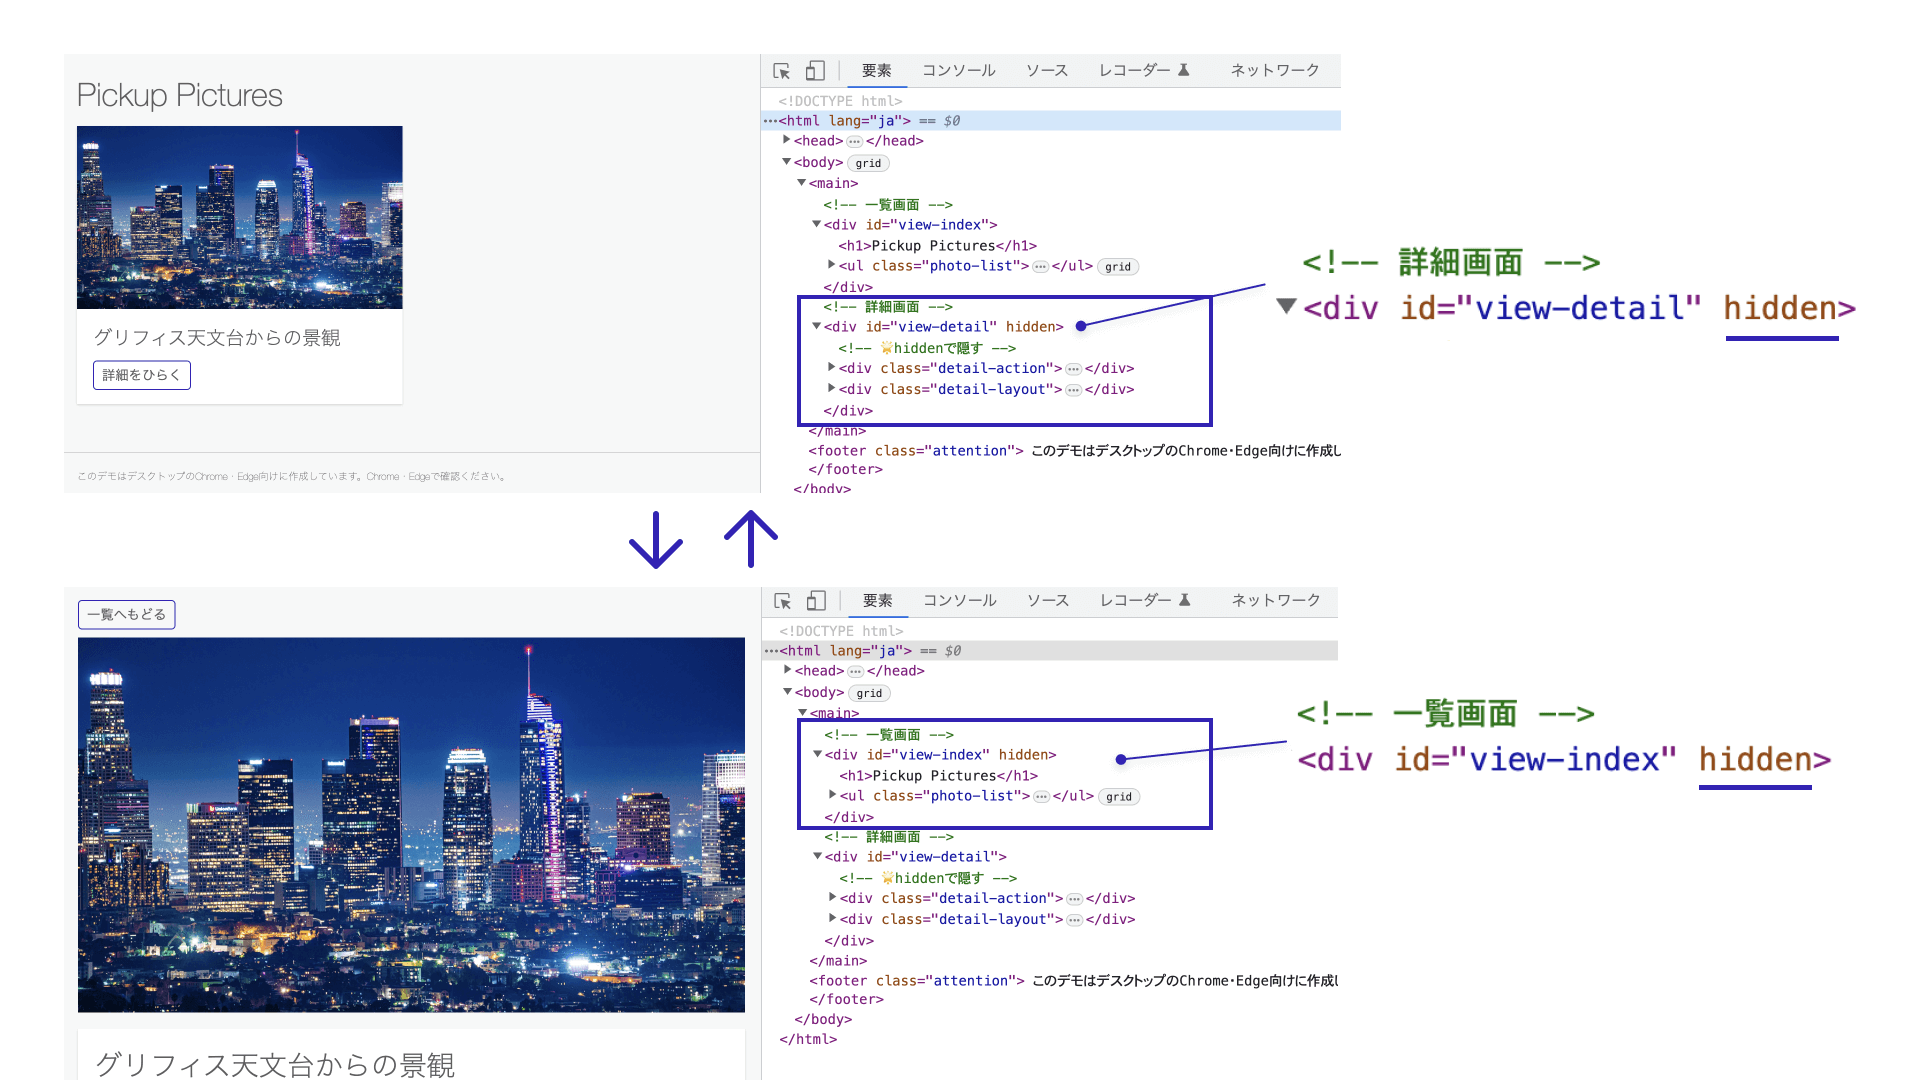
In the HTML, prepare a list view and a detail view, and switch between them when the buttons are pressed. The detail view is hidden with the hidden attribute.
<!-- List view -->
<div id="view-index">
  <!-- Omitted -->
  <ul class="photo-list">
    <li>
      <div class="photo-link">
        <img class="photo-thumb" src="images/photo_1.webp" />
        <div class="photo-meta">
          <!-- Omitted -->
          <div>
            <button class="btn button-open">Open details</button>
          </div>
        </div>
      </div>
    </li>
  </ul>
</div>

<!-- Detail view -->
<div id="view-detail" hidden><!-- 🌟hidden to hide it -->
  <div class="detail-action">
    <button class="btn button-close">Back to list</button>
  </div>
  <div class="detail-layout">
    <div>
      <img class="photo-detail" src="images/photo_1.webp" />
    </div>
    <!-- Omitted -->
  </div>
</div>
For readability, the width, height, and alt attributes of the img tags are omitted here, but they are included in the actual sample.
In JavaScript, call document.startViewTransition() when the button is pressed. Pass a function that rewrites the DOM to its post-transition state as the argument to startViewTransition(). In addition to synchronous functions, async functions are also supported.
Switching the appearance and disappearance of elements is handled by toggling the hidden attribute.
// ---------------------------
// From the list view to the detail view
// ---------------------------
const buttonOpen = document.querySelector(".button-open");

buttonOpen.addEventListener("click", () => {
  // Call the View Transitions API
  document.startViewTransition(() => {
    // Define the DOM structure after the transition
    document.querySelector("#view-index").hidden = true;
    document.querySelector("#view-detail").hidden = false;
  });
});

// ---------------------------
// From the detail view back to the list view
// ---------------------------
const buttonClose = document.querySelector(".button-close");

buttonClose.addEventListener("click", () => {
  // Call the View Transitions API
  document.startViewTransition(() => {
    // Define the DOM structure after the transition
    document.querySelector("#view-index").hidden = false;
    document.querySelector("#view-detail").hidden = true;
  });
});
With this implementation, the screen changes with a crossfade during the transition.
document.startViewTransition() comes with a default effect of a crossfade lasting about one second.
Understanding the mechanism
Let’s look at how this effect works. When you call document.startViewTransition(), processing proceeds as follows.
- The
document.startViewTransition()method is called - Snapshots are taken before and after the DOM change
- The snapshots are placed on the topmost layer of the HTML
- The change is displayed as a crossfade
It appears that the function passed to document.startViewTransition(function) is called during step (2).
Steps (2) and (3) are implicit, but you can confirm in DevTools’ Elements panel that special elements are placed directly under the HTML root.
<html>
  ::view-transition
  └─ ::view-transition-group(root)
    └─ ::view-transition-image-pair(root)
        ├─ ::view-transition-old(root)
        └─ ::view-transition-new(root)
These are expressed with :: because they are pseudo-elements. The ::view-transition pseudo-element creates the effect through the following behavior.
::view-transitionis placed above the page content.::view-transition-oldis a screenshot of the old page view, and::view-transition-newis the live rendering of the new page view.
The old view ::view-transition-old animates its opacity from 1.0 to 0.0, and the new view ::view-transition-new animates from 0.0 to 1.0. This produces the default crossfade.
As a side note, the intermediate layer ::view-transition-image-pair uses mix-blend-mode: plus-lighter;, which creates a natural crossfade (see “CSSのブレンドモードが素敵! mix-blend-modeを使いこなそう”).
Step 2. Connecting elements across two views
Next, let’s create a transition that behaves continuously.

To apply an independent animation to a specific element, assign view-transition-name in CSS.
/* List view */
.photo-thumb {
  view-transition-name: photo-example;
  contain: paint;
}

/* Detail view */
.photo-detail {
  view-transition-name: photo-example;
  contain: paint;
}
The same view-transition-name is assigned to img elements written in different places in the HTML structure. The following is a simplified excerpt from the HTML so the structure is easier to understand. Also note that one of the DOM trees is hidden with the hidden attribute.
<!-- List view -->
<div id="view-index">
  <!-- Omitted -->
  <ul class="photo-list">
    <li>
      <div class="photo-link">
        <!-- 🌟Connect from this image -->
        <img class="photo-thumb" src="images/photo_1.webp" width="640" height="360" alt="" />
        <!-- Omitted -->
      </div>
    </li>
  </ul>
</div>

<!-- Detail view -->
<div id="view-detail" hidden><!-- 🌟hidden to hide it -->
  <!-- Omitted -->
  <div class="detail-layout">
    <div>
      <!-- 🌟Connect to this image -->
      <img class="photo-detail" src="images/photo_1.webp" width="640" height="360" alt="" />
    </div>
    <!-- Omitted -->
  </div>
</div>
With this implementation, the photo switches continuously during the screen transition. Its position and size animate as though they are continuously connected. Even though the image in the list view and the image in the detail view have completely different structures, the image still transitions between them as if it were one continuous element.
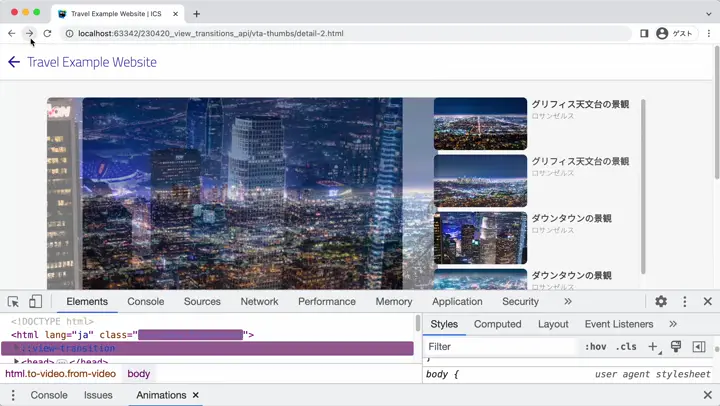
Let’s inspect the DOM structure in DevTools’ Elements tab. Inside the ::view-transition pseudo-element, two kinds of groups are generated: the default ::view-transition-group(root) and ::view-transition-group(photo-example) (an arbitrary name) created with view-transition-name.
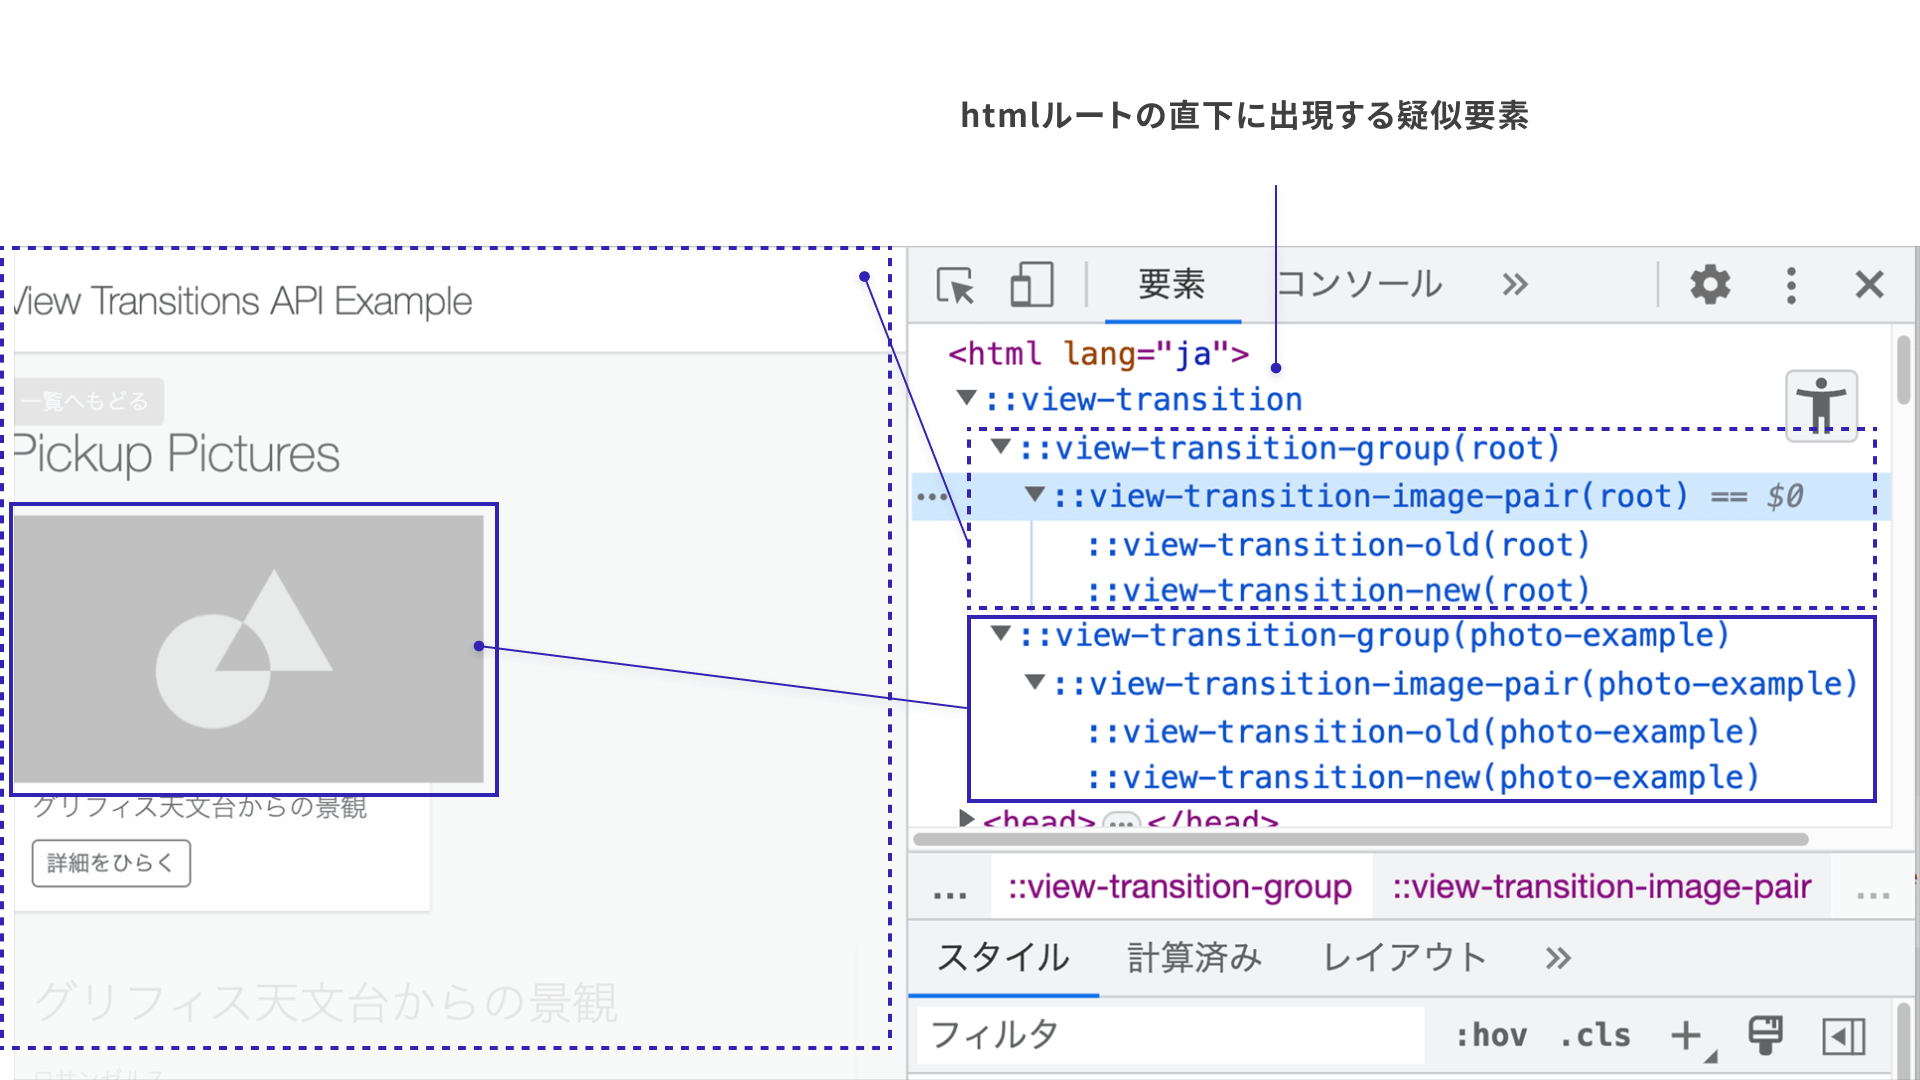
::view-transition-group(root)is the default animation, and the entire screen works as a crossfade.::view-transition-group(photo-example)animates only the target object so that its position and size connect continuously.
If you hover over the pseudo-elements, each one is highlighted, which helps you understand the structure.
Supplement: Ways to switch screen elements
Up to this point, the explanation has used the hidden attribute. You can also control it with display: none instead of hidden.
const buttonOpen = document.querySelector(".button-open");
buttonOpen.addEventListener("click", () => {
  // Call the View Transitions API
  document.startViewTransition(() => {
    // Define the DOM structure after the transition
    document.querySelector("#view-index").style.display = "none";
    document.querySelector("#view-detail").style.display = "block";
  });
});
You can also control it by whether the element exists in the DOM tree, so appendChild() and removeChild() can be used as well.
const buttonOpen = document.querySelector(".button-open");

const elContainer = document.querySelector("#container");
const elIndex = document.querySelector("#view-index");
const elDetail = document.querySelector("#view-detail");

// Remove the detail view from the DOM tree
elContainer.removeChild(elDetail);

buttonOpen.addEventListener("click", () => {
  // Call the View Transitions API
  document.startViewTransition(() => {
    elContainer.appendChild(elDetail); // Add to the DOM tree
    elContainer.removeChild(elIndex); // Remove from the DOM tree
  });
});
Step 3. Transition multiple elements continuously
So far, we have animated only one element. Now let’s try applying it to multiple elements as well.
In the following example, two items are placed in the list view, and each transitions to its own detail view.
Assign a separate view-transition-name string to each element you want to connect. For the first photo, specify photo-example-1; for the second photo, specify photo-example-2.
/* Photo 1 */
.photo-1 {
  view-transition-name: photo-example-1;
  contain: paint;
}
/* Photo 2 */
.photo-2 {
  view-transition-name: photo-example-2;
  contain: paint;
}
<!-- List view -->
<div id="view-index">
  <ul class="photo-list">
    <li>
      <!-- Omitted -->
      <img class="photo-thumb photo-1" data-content="1" src="images/photo_1.webp"  />
    </li>

    <li>
      <!-- Omitted -->
      <img class="photo-thumb photo-2" data-content="2" src="images/photo_2.webp"  />
    </li>
  </ul>
</div>

<!-- Detail view -->
<div class="view-detail" data-content="1" hidden>
  <!-- Omitted -->
  <img class="photo-detail photo-1" src="images/photo_1.webp" />
</div>

<div class="view-detail" data-content="2" hidden>
  <!-- Omitted -->
  <img class="photo-detail photo-2" src="images/photo_2.webp"  />
</div>
In JavaScript, the value of the custom data-content attribute is used to toggle the hidden attribute of the target element.
Using it with Vue.js
The View Transitions API can also be used in JavaScript frameworks. You use it by inserting document.startViewTransition() around DOM changes.
As one example, here is how to implement it in Vue.js. Call document.startViewTransition() when the state changes.
import { createApp, ref, nextTick } from "vue";

// ...omitted...

const app = createApp({
  setup() {
    // State indicating which view is currently displayed
    const currentContent = ref(null);

    // Screen transition function
    const goPage = (content) => {
      // Perform the transition using the View Transitions API
      document.startViewTransition(async () => {
        currentContent.value = content;
        await nextTick();
      });
    };
    return { currentContent, goPage };
  },
  // ...omitted...
});
app.mount("#app");
Here is an example that uses Vue.js as a lightweight enhancement. It can be achieved with a short amount of code. Vue.js is convenient because you can layer JavaScript onto plain HTML. For details, see “HTMLにちょい足しでできる! Vue.jsでサクッと動きをつける方法”.
That concludes the basic explanation of how to use the View Transitions API in a simple way.
Revisiting the demo from the beginning
Now let’s look back at the technologies used in the demo from the beginning. Here is what kind of implementation is needed to incorporate the View Transitions API into a website.
Router transitions
Multiple HTML files are switched as an SPA, and the URL in the address bar is changed with history.pushState(). It is controlled with plain JavaScript.
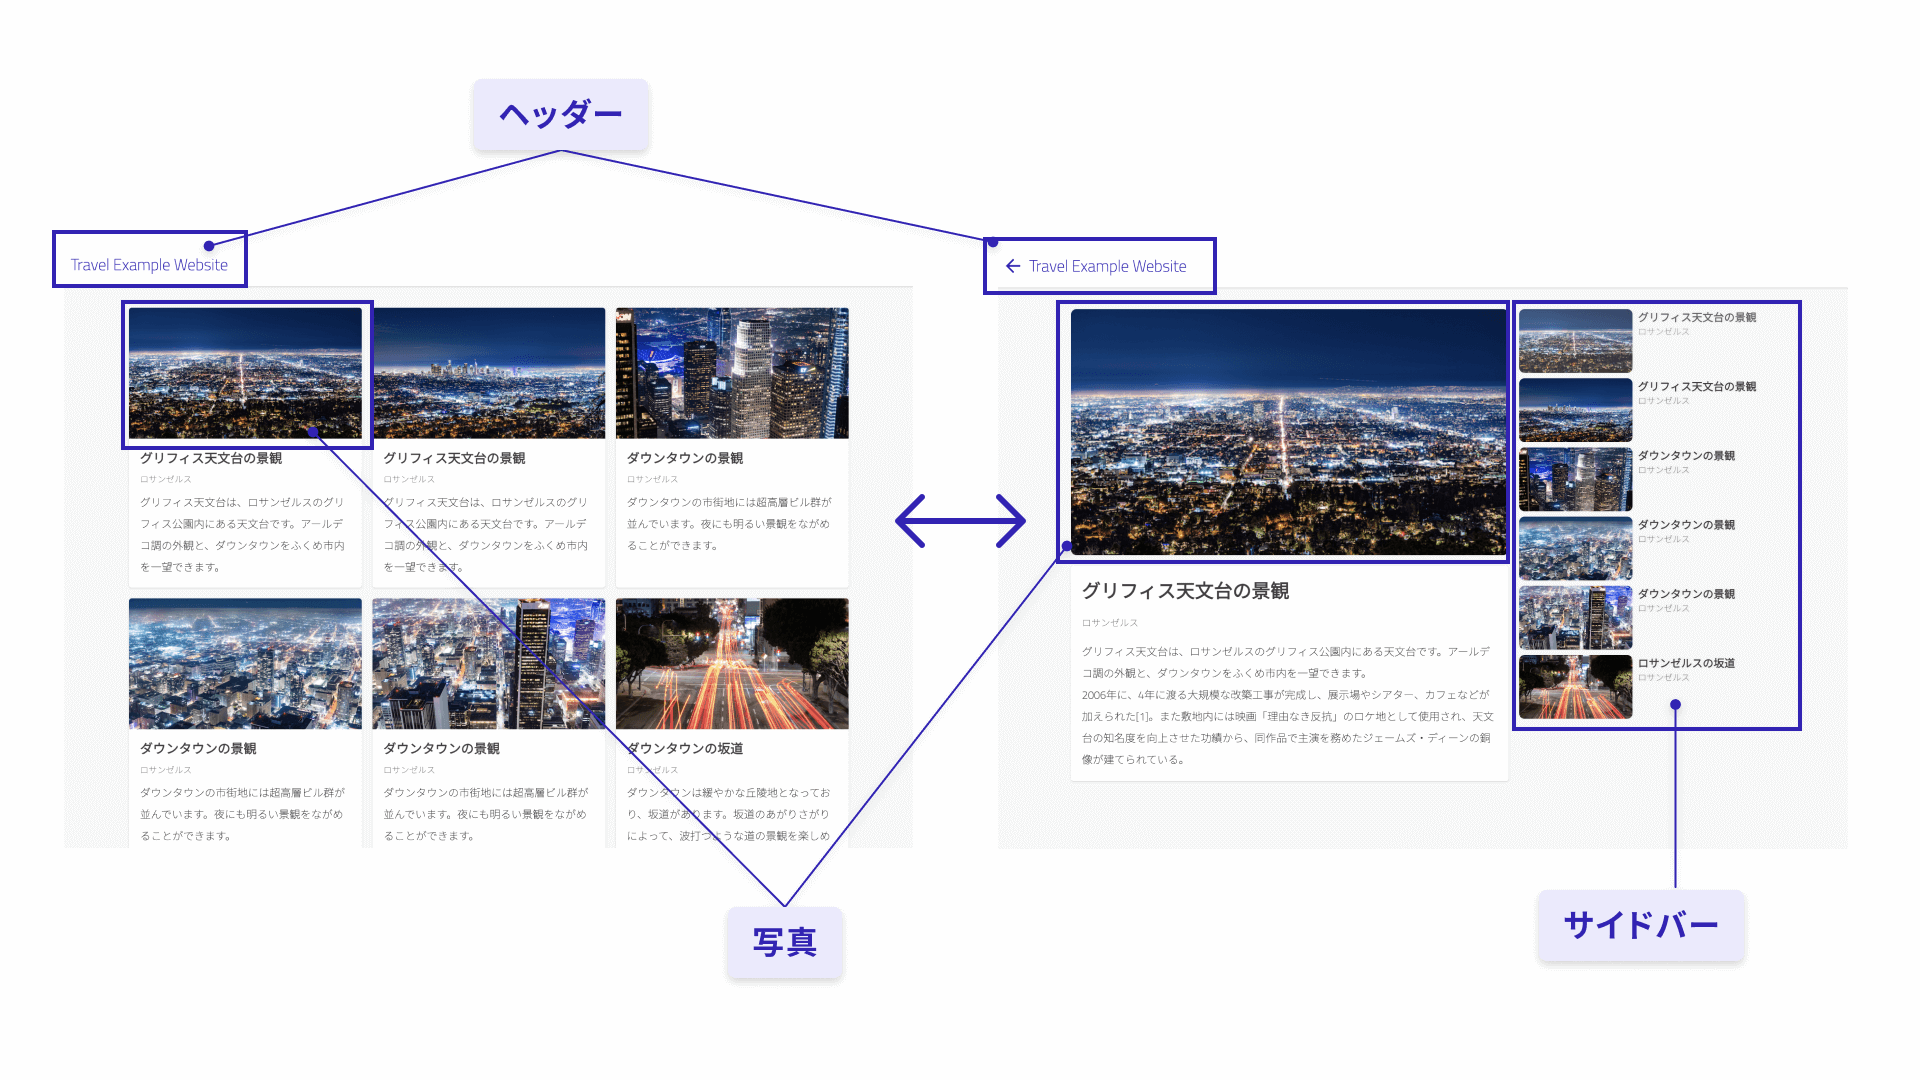
Structure of the parts
view-transition-name is divided into three groups of elements. These parts are separated so that each can move with a different animation.
Switching the effects
The View Transitions API effects are switched according to the direction of the page transition. CSS classes are added to the root html element to control when CSS Animations fire. Various patterns of CSS classes are defined while taking the direction of the page transition into account.
- List view to detail view / detail view to list view / detail view to detail view
- Whether the browser history action is Back / or Forward
The implementation is more complex than it may look. In practice, making effective use of the View Transitions API requires a combination of many different techniques. In addition to JavaScript for DOM rewriting, you need CSS knowledge and know-how, as well as good judgment for UI animation.
Browser support
Supported browsers are as follows.
- SPA
- Chrome 111 and Edge 111 (released in March 2023) or later
- Safari 18.0 (released in September 2024) or later
- Firefox 144 (released in October 2025) or later
Reference: Can I use…
- MPA
- Chrome 126 and Edge 126 (released in June 2024) or later
- Safari 18.2 (released in December 2024) or later
- Firefox is not supported yet
Reference: Can I use…
Framework support
Next.js
The View Transitions API can also be used in the React framework Next.js.
Nuxt
Nuxt 3.4 (released in April 2023) includes the View Transitions API as an experimental feature. By specifying the experimental.viewTransition option in the nuxt.config.ts configuration file, you can enable it for all page transitions.
▼nuxt.config.ts file
export default defineNuxtConfig({
  // Experimental features
  experimental: {
    // Flag to enable the View Transitions API
    viewTransition: true
  }
})
A simple demo shows an implementation example, so if you have experience with Vue.js or Nuxt, definitely give it a try. You can edit the source code online while checking how it works.
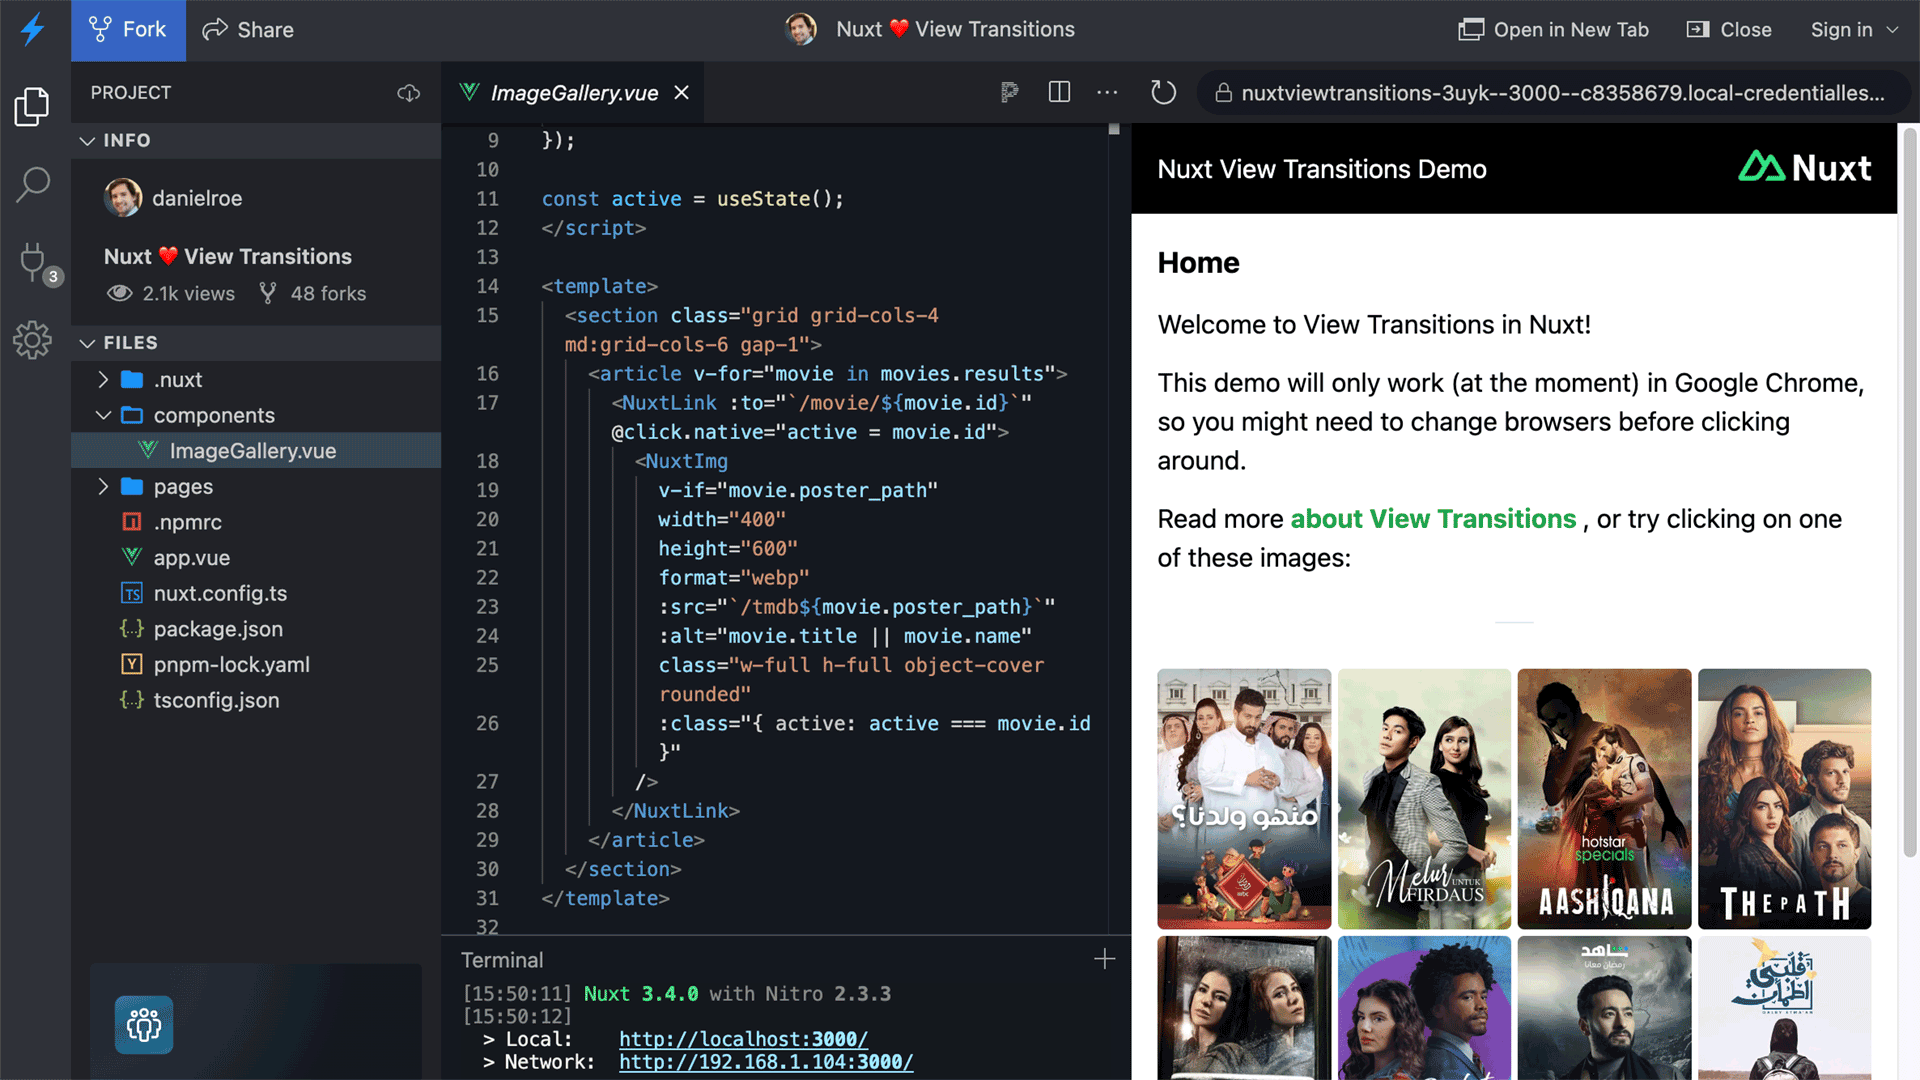
This site, ICS MEDIA, uses Nuxt, so the View Transitions API is enabled. Please try navigating from ICS MEDIA.
This site provides an option to disable animations for people who are sensitive to motion. View Transitions API animations depend on OS settings, so please check your OS settings before trying them. For details, see “CSSでもアクセシビリティに配慮しよう! モーション軽減・文字サイズ変更・ダークモードの実装方法”.
Implementation is difficult, and design matters
Finally, here are some important points to keep in mind about the View Transitions API.
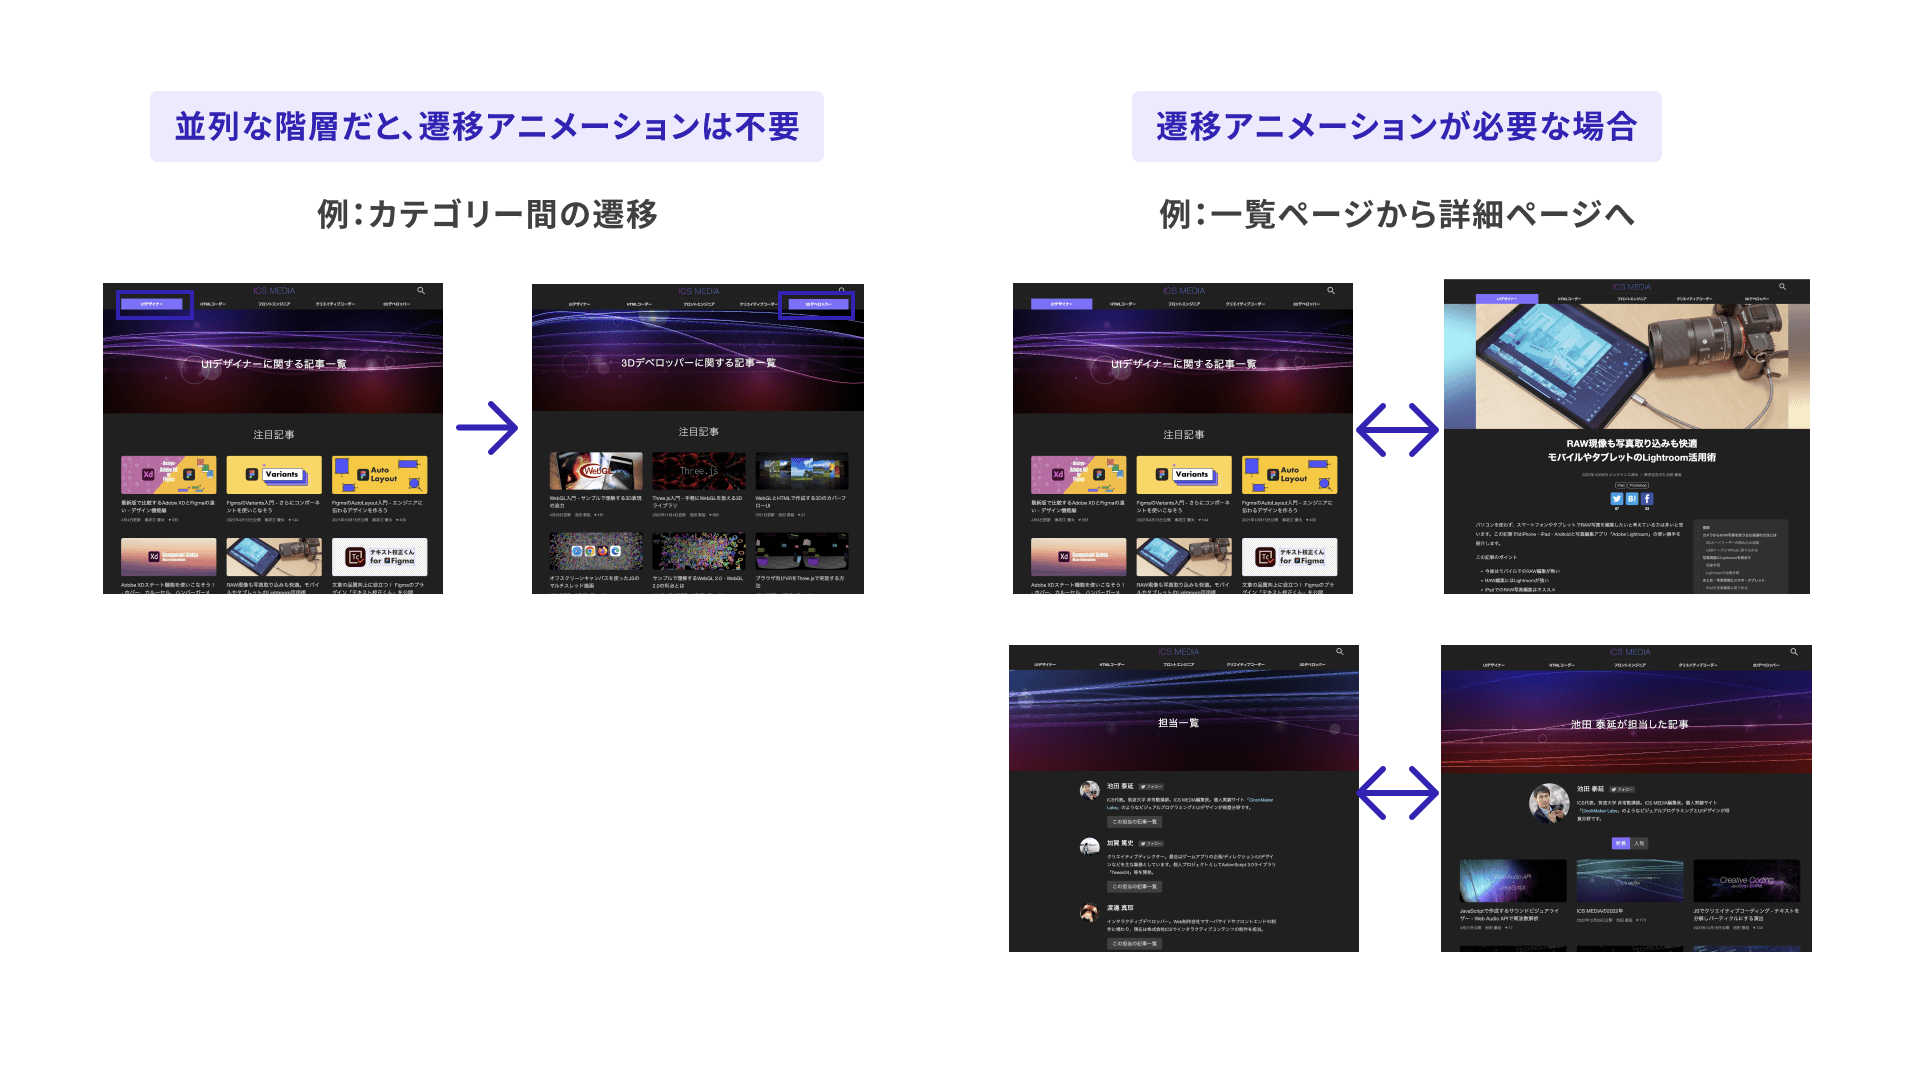
① You need to determine which pages should animate
When creating screen transitions with the View Transitions API, you need to consider which page-to-page transitions on the website should use animation.
There will be cases where “you want animation on certain screens” and “you do not want animation on other screens.” At the screen design stage, you need to determine which screen-to-screen transitions actually need animation.
Depending on the framework, it may be easy to enable the View Transitions API for every screen transition. In that case, you may instead need an implementation that deliberately disables it only for specific transitions.
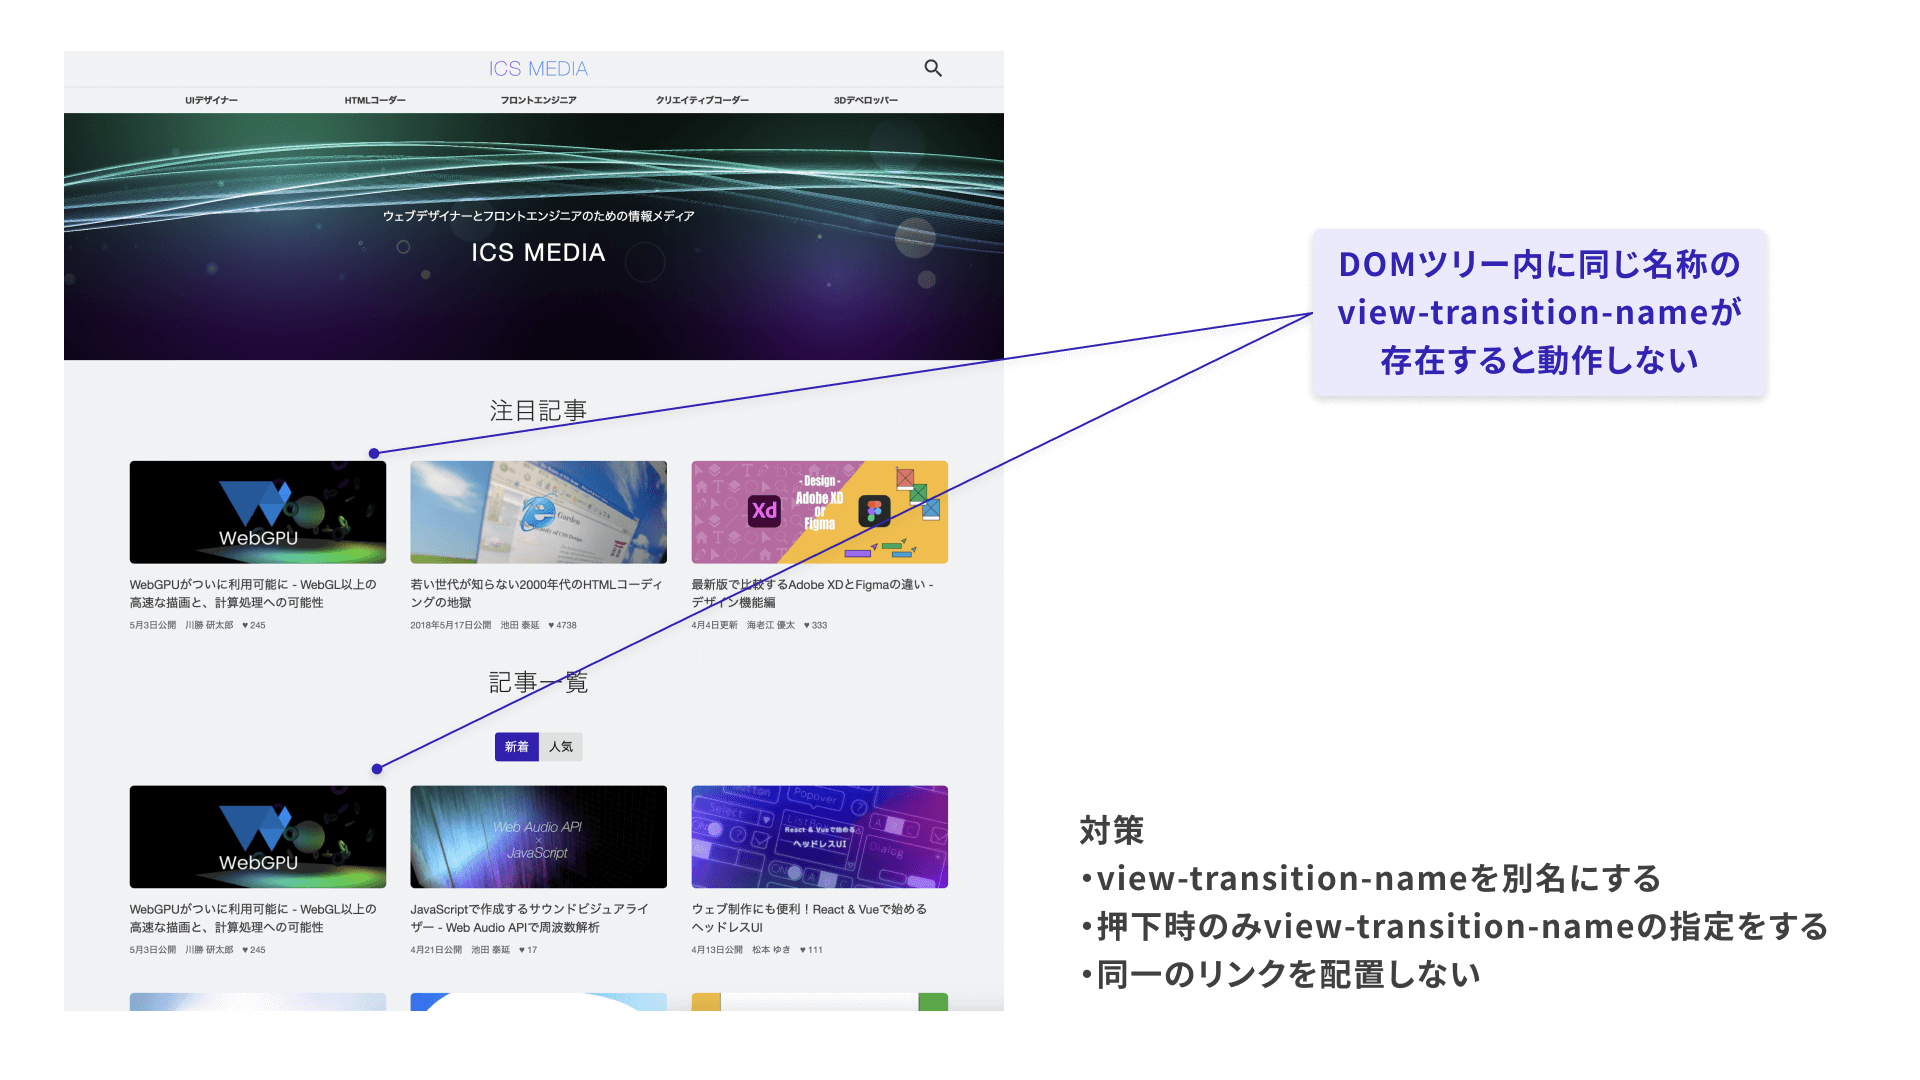
② Avoid duplicate view-transition-name values
Two or more elements with the same view-transition-name cannot exist at the same time in the visible DOM tree. If duplicate view-transition-name values exist, none of the View Transitions API animations will fire at all.
You need to resolve this either through screen design or through implementation-level workarounds.
One possible countermeasure is to switch view-transition-name dynamically. However, be careful: if the view-transition-name of an HTML element changes while a View Transitions API effect is in progress, the browser itself can crash.
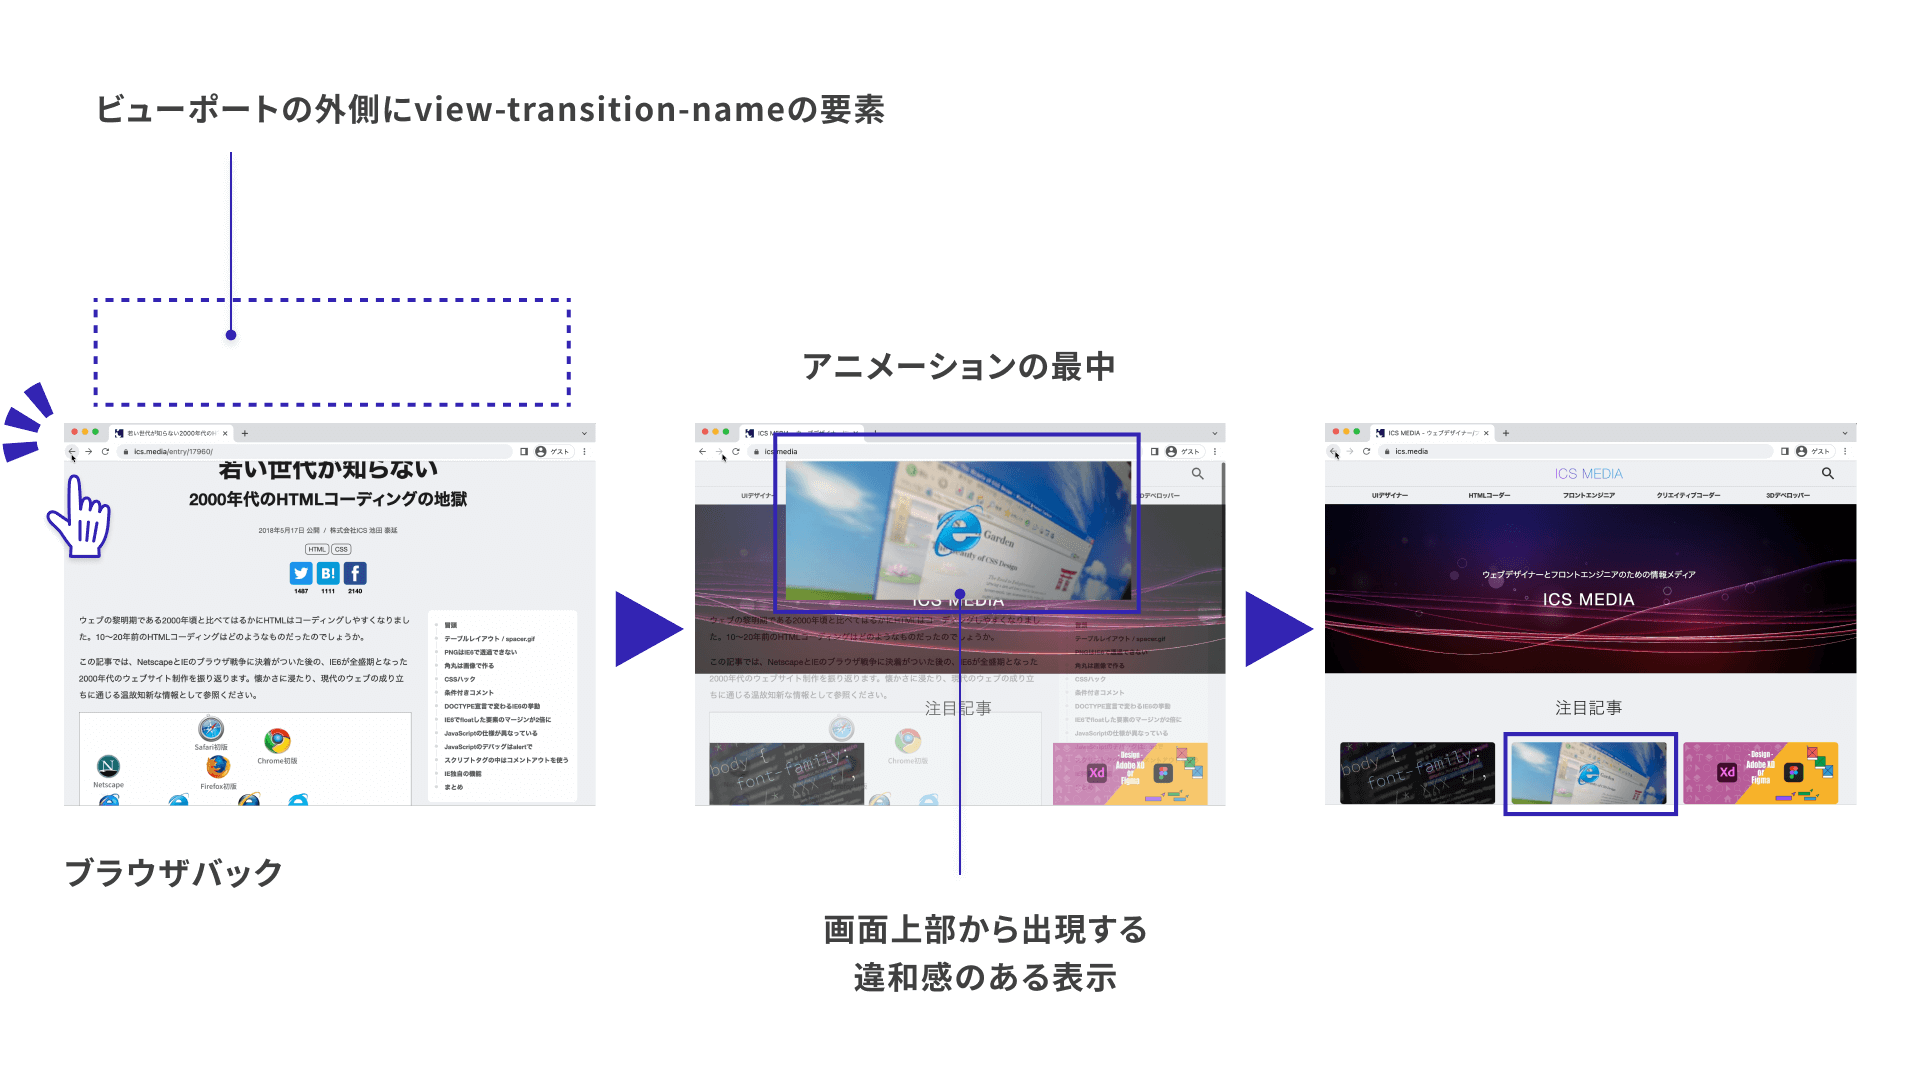
③ You need viewport detection
In a typical web page, users can scroll vertically. Even if an element is outside the scroll area (outside the viewport) before or after the transition, the View Transitions API animation still fires.
If the animation starts from coordinates outside the viewport, the result can look unnatural.
As a countermeasure, it would be ideal to use the Intersection Observer API to detect whether the element is inside the viewport and trigger the effect only when it is visible within the viewport. On this site, however, there are technical barriers, and we have not been able to address this completely.
Conclusion
This article introduced how to use the View Transitions API.
The future potential of animations that connect across screen transitions was introduced in an Adobe MAX talk in 2018. You can review the slides from that time in “イマドキのUIデザインには欠かせない! マイクロインタラクションを作るためのズルいCC活用テクニック(Adobe MAX JAPAN 2018発表資料)”. At the time, I said that the web still had technical challenges, but with the arrival of the View Transitions API, it has now entered a phase where this is possible.
The View Transitions API is an appealing feature that expands the possibilities of the web. I believe the key point is to use it in ways that appropriately guide the user’s gaze, deepen immersion in the content, and support operation. As a means of improving UX, I hope we will see more effects that are genuinely beneficial to users.